Waveshare ESP32-S3-Touch-LCD-3.49 Review: What It Does and How to Program It
Every part of the Waveshare ESP32-S3-Touch-LCD-3.49 board and what it is for: display quality, an AI voice assistant with the speaker and microphones, ways to program it, writing the code with Claude, use cases and pitfalls.
Contents 10 sections
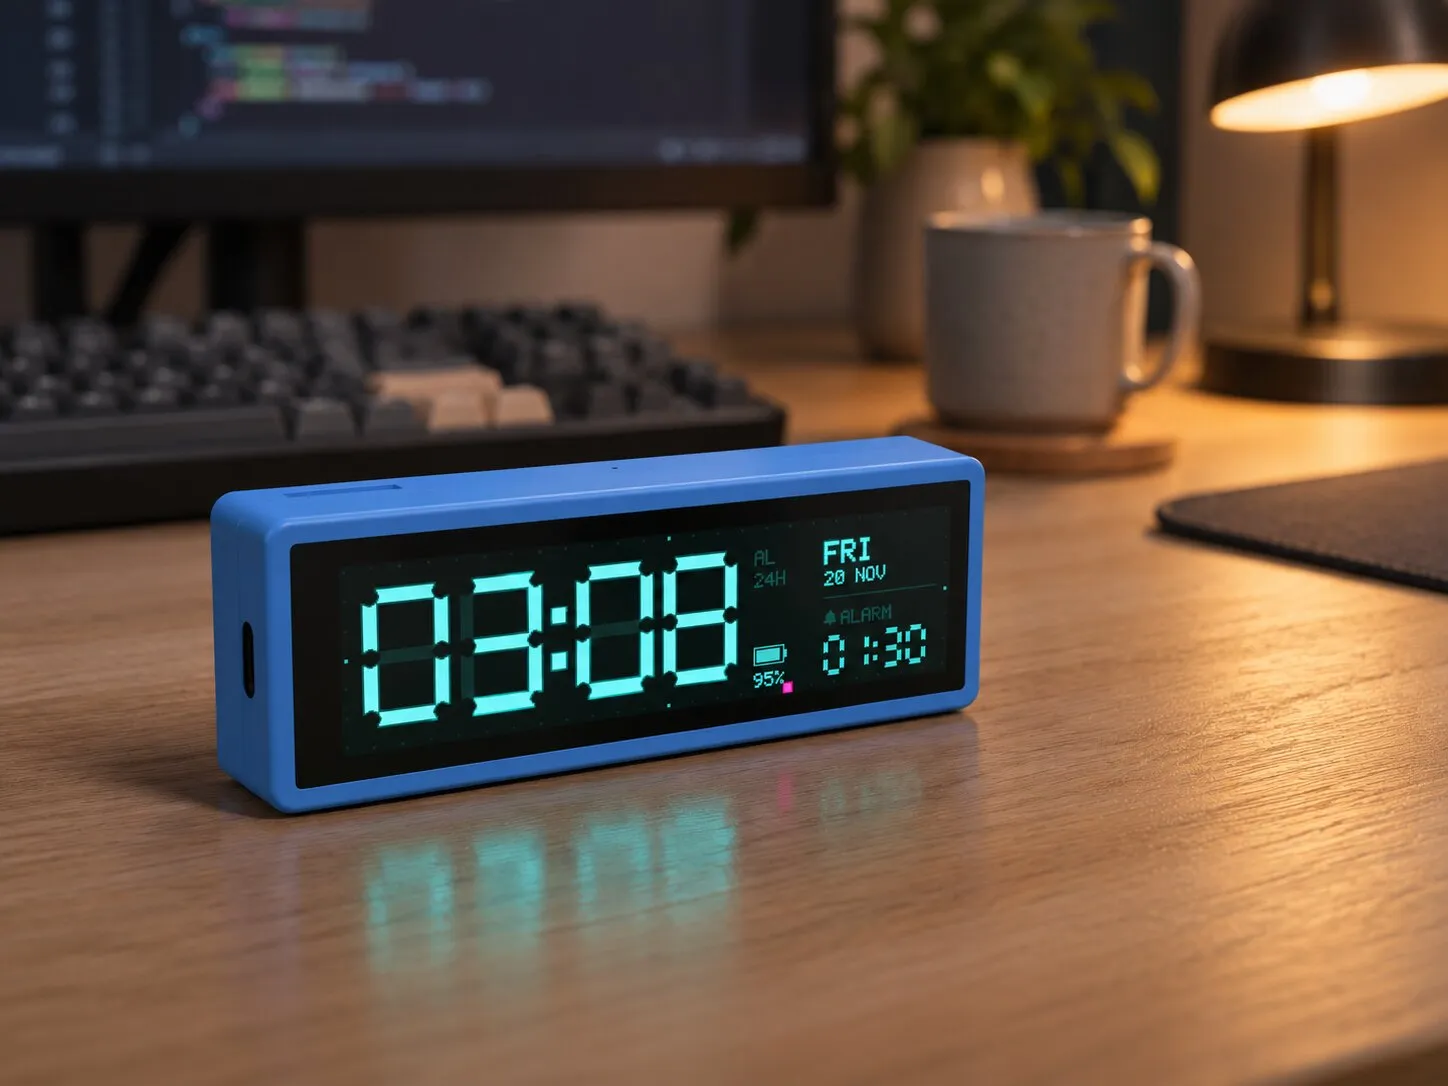
The Waveshare ESP32-S3-Touch-LCD-3.49 is an ESP32-S3 development board with a 3.49-inch, 172×640 touch bar display. A speaker output, dual microphones, a clock chip, a motion sensor and a battery input are all on the board. It is enough on its own, without soldering, for a desk clock, an internet radio, a Home Assistant panel or a voice AI assistant.
In short:
- A long, thin touch screen: 640×172, IPS, 350 cd/m².
- Audio, two microphones, a clock, a motion sensor, battery charging and a TF card slot are all on the board.
- It works as a voice AI assistant: the XiaoZhi project officially supports the board.
- Programmable with Arduino, ESP-IDF, ESPHome and PlatformIO; having Claude write the code is the shortest route today.
- I wrote an open-source desk device firmware for it called Phosphor. Most of the pitfalls below come from that.
I bought this board to have a display on my desk, then ended up writing a whole piece of software for it. In this post I go through every part of the board and put the real question next to each one: what is it good for?
What is the ESP32-S3-Touch-LCD-3.49?
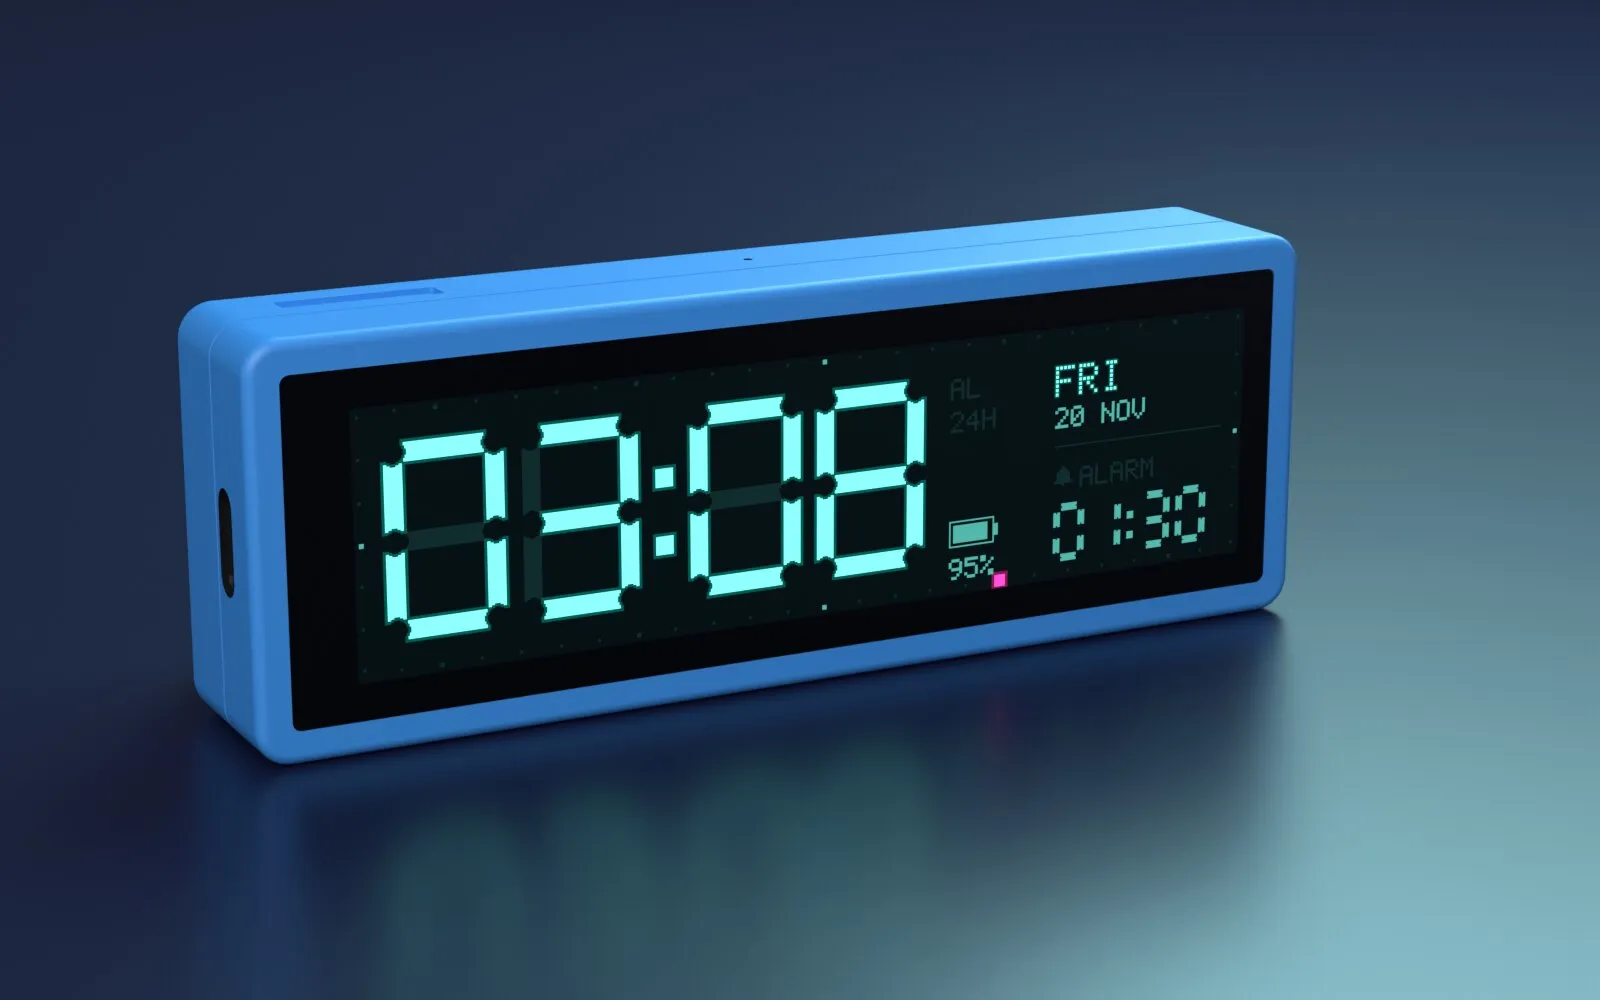
It is one of Waveshare’s ESP32-S3 development boards where the display is the board itself. What sets it apart is the shape of the screen: not a square but a bar, a strip 640 pixels long and 172 pixels high.
Waveshare pitches the board for “AI interaction and offline voice commands”. The reason is that the audio side is complete: a codec for the speaker, two microphones and an echo cancellation circuit are already on the board.
The parts on it make it a standalone device. Add a speaker and it is a radio, add a battery and it is portable. It is sold in an enclosure, so on a desk it looks like a finished product.
At a glance
- Display
- 3.49″ IPS, 640×172Bar-shaped, touch
- Processor
- ESP32-S3, 2 × 240 MHz
- Memory
- 8 MB PSRAM, 16 MB flash
- Audio
- Speaker output + 2 microphonesEcho cancellation on the board
- Sensors
- 6-axis motion, clock chip
- Power
- USB-C, 3.7 V battery charging
Versions, price and where to buy
The board is sold in two enclosures and two versions. On the day I wrote this, the Case B version without a battery was $29.99 in the Waveshare store.
| SKU | Model | Case | Battery |
|---|---|---|---|
| 32373 | ESP32-S3-Touch-LCD-3.49 | Case A | 18650 cell included |
| 32374 | ESP32-S3-Touch-LCD-3.49-EN | Case A | No battery |
| 32375 | ESP32-S3-Touch-LCD-3.49B | Case B | 3.7 V LiPo included |
| 32376 | ESP32-S3-Touch-LCD-3.49B-EN | Case B | No battery |
According to CNX Software’s measurements, Case A is 98.5 × 34.8 × 31.8 mm and Case B is 98.5 × 34.8 × 22.8 mm. So the 18650 cell makes the case thicker, and B with the LiPo is slimmer.
Specs and what each one is for
The numbers are from Waveshare’s own product page and documentation.
| Part | What is there | What it is for |
|---|---|---|
| Processor | ESP32-S3R8, dual core, 240 MHz | One core can drive the display, the other the audio or network |
| Memory | 512 KB SRAM, 8 MB PSRAM, 16 MB flash | Fits a full-screen frame, audio buffers and speech recognition models |
| Display | 3.49-inch IPS, 172×640, 350 cd/m², 1200:1 | Clock, status bar, ticker, graphs |
| Touch | Capacitive, AXS15231B | Swipe, tap, long press |
| Audio output | ES8311 codec, MX1.25 speaker connector | Radio, music, voice replies, alarms |
| Audio input | ES7210, dual digital microphones, echo cancellation | Wake word, voice commands, AI chat |
| Motion | QMI8658, 6-axis | Rotating the screen when you turn the board, shake detection, step counting |
| Clock | PCF85063 real-time clock | Knowing the time even after a power cut |
| Storage | TF card (FAT32) | MP3s, images, data logging |
| Wireless | Wi-Fi 2.4 GHz, Bluetooth 5 LE | Internet radio, weather, Home Assistant |
| Power | USB-C, 3.7 V lithium battery charging, PWR button | Cordless use, software shutdown |
| Expansion | 22 solder pads at 2.54 mm, IPEX antenna | Extra sensors, external antenna |
Processor and memory: why the 8 MB of PSRAM matters
The ESP32-S3 has two cores. In practice that means the radio does not stutter while the screen is drawing: audio runs on one core, the interface on the other.
The real trump card is the 8 MB of PSRAM. A full 640×172 frame fits comfortably, so you can draw the image in memory first and then push it to the screen. No flicker. Espressif’s speech recognition models also fit in this memory; I cover that in the AI section below.
In my experience the limit was not flash but the chip’s own internal memory (512 KB SRAM). The buffers for encrypted internet connections live there. That is why I only open one HTTPS connection at a time.
Display quality
The panel’s numbers, and what they mean on a desk:
- IPS: colors do not wash out at an angle, so it is readable from the side.
- 16.7 million colors, 1200:1 contrast.
- 350 cd/m²: a figure meant for indoors, not for direct sunlight.
The pixel density is high: 640 pixels fit in 3.49 inches. I used that the other way round and deliberately scaled the pixels up 2×2 to get an old VFD and 8-bit look.
The real character of the screen is its shape. A height of 172 pixels means two or three lines of info. A clock, a single-line notification, a progress bar, a spectrum or a ticker all look great. It is too narrow for lists, forms and multi-line menus.
Touch
The display and the touch controller are on the same chip, the AXS15231B. Swiping, tapping and long press work fine. I use left-right swipes to change pages and up-down swipes to change the volume.
Waveshare does not say how many fingers it reads at once. One finger was enough for my use.
Audio and microphones: can it be an AI assistant?
Yes. This is the least known but most powerful side of the board.
Output: there is an ES8311 codec and an MX1.25 speaker connector. Plug in a small speaker and it becomes an internet radio, a music player or a device that answers with voice. That is how the radio works in my Phosphor.
Input: the ES7210 chip reads two digital microphones, and the board has an echo cancellation circuit. Echo cancellation is what lets the device hear you while it is talking through its own speaker.
With this you can work at three levels:
- Offline wake word and commands. Espressif’s ESP-SR library recognizes a wake word (WakeNet) and predefined commands (MultiNet) on the ESP32-S3 without going online. The models run in PSRAM, which is where the 8 MB earns its keep. It suits fixed commands like “turn on the light” or “stop the radio”.
- A conversational AI assistant. The open-source XiaoZhi project officially supports this board, with separate folders for V1 and V2. The board listens for the wake word, sends your speech to a server, a language model on the server answers, and the answer is read out through the speaker. Waveshare’s documentation also has a XiaoZhi setup guide.
- A Home Assistant voice assistant. With ESPHome’s micro_wake_word and voice_assistant components, the board can be a voice assistant for Home Assistant. The community project xiaozhi-esphome lists this board among the supported ones.
Motion sensor
The QMI8658 has a 3-axis accelerometer and a 3-axis gyroscope. The board knows how it is held, whether it is tilting and whether it is being shaken.
What it is for: rotating the interface when you turn the board upright, triggering something on a shake, counting steps. I used it in the scenes: when you tilt the board the sea and snow on screen tilt too, and on the hourglass page the sand falls according to real gravity.
Clock chip
The PCF85063 is a real-time clock. The device does not forget the time when it is switched off and on, and it shows the right time even with no internet. If you are building a desk clock and an alarm, this chip frees you from depending on the internet.
Battery, charging and the power button
The charging input for a 3.7 V lithium battery is on the board. The PWR button turns the board on and off in software when it runs on battery. So you need no extra circuit to build a battery-powered device that switches off with its button.
Waveshare gives no battery life or consumption figure. The backlight and Wi-Fi are the two biggest drains; if you want long battery life you will need to cut back both.
TF card, wireless and expansion
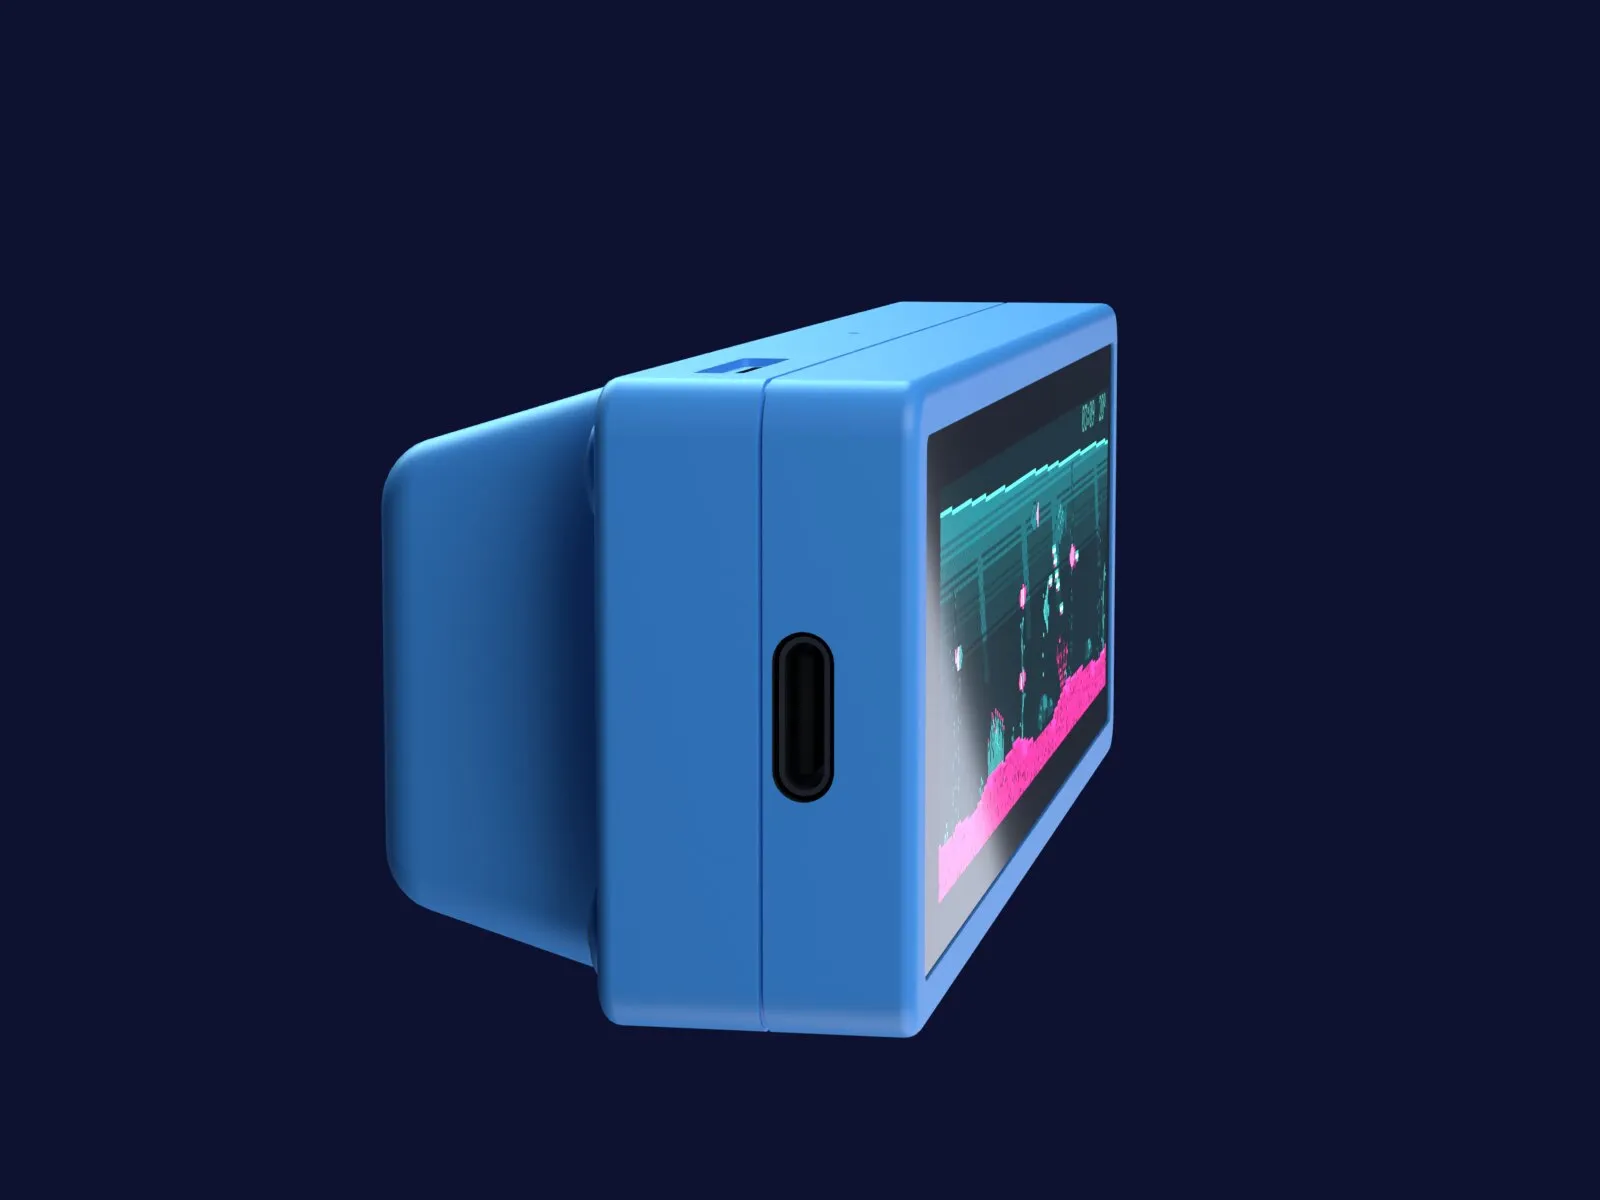
The TF card slot is for playing MP3s, showing images or logging sensor data. Wi-Fi and Bluetooth 5 LE are on the board; there is also an IPEX connector for an external antenna, but to enable it you have to resolder a resistor on the board.
The 22-pin solder pads are for attaching extra sensors. There is no ready-made socket; if you add something, you will be soldering.
What is it used for?
Real examples I know of that were built with this board:
- Desk clock and radio. TuneBar shows internet radio, MP3s from the TF card, weather and air quality. My own Phosphor has a clock, radio, weather, a focus timer and pixel scenes.
- Home Assistant control panel. Touch Panel Manager turns the board into a multi-page home control panel, rotates the screen when you turn the board, and also has a Turkish interface.
- Voice AI assistant. An assistant that talks with XiaoZhi and shows the answer on its screen.
- Status and notification display. The bar shape is ideal for single-line info: server status, exchange rates, the next meeting on your calendar, the result of a code build.
- Portable measurement device. Battery, motion sensor and TF card in one: measure the data, show it on the screen, save it to the card.
Waveshare’s community page also lists a weather clock with satellite imagery and a GPS tracker.
How do you program it?
The board connects to the computer over USB-C. If firmware will not upload, hold the BOOT button and press RESET once to enter upload mode.
| Route | Who it suits | Note |
|---|---|---|
| Install ready-made firmware | People who do not want to write code | XiaoZhi, TuneBar, Phosphor. Phosphor installs from the browser |
| Arduino IDE | Beginners | Waveshare examples use ESP32 Arduino core 3.3.0 |
| ESP-IDF | People who want full control | Examples use ESP-IDF 5.5.3, with the VS Code extension |
| PlatformIO | People who want to keep a project tidy | No official board definition; TuneBar’s config file is a useful reference |
| ESPHome | Home Assistant users | No code, just YAML; display and touch supported |
| MicroPython | Not recommended | I could not find a ready-made display driver for this board |
Waveshare has ten ready examples for Arduino and ESP-IDF: battery voltage, the clock chip, the motion sensor, the TF card, Wi-Fi, the power button, recording with the microphone and playing through the speaker, and LVGL 8 and LVGL 9 interface examples. On the ESP-IDF side there is also a factory program that tests all the hardware. If you are just starting, flash these in order first; you will see every part working.
The most common library for the interface is LVGL. It gives you ready-made parts like buttons, sliders and charts. For a lighter route, the Arduino_GFX library has this screen’s AXS15231B driver. Espressif’s own component registry also has esp_lcd_axs15231b.
In ESPHome, the display comes as a ready preset under this board’s name in the mipi_spi component, and touch is read with the axs15231 component. People who configured the generic AXS15231 model by hand reported size errors; pick the board’s ready preset.
Writing the code with Claude
I wrote Phosphor’s code with Claude Code. This is what works when you have an AI write code for this board:
- Give it the source. Show Claude the address of the Waveshare documentation, whether your board is V1 or V2, and the relevant example code. Do not let it guess the pins; make it read them from the example.
- Start small. First get “print some text on the screen” working, then touch, then audio. Compile and flash at every step.
- Ask it to verify. Do not assume it works just because the code compiled. I added a small endpoint to the board that reads the screen image back over the network; that is how Claude sees what is really on the screen.
- Make it measure. Ask for numbers instead of “make it faster”. That is how we tried double-buffered pushes to the screen; the result is below.
- Verify the board before flashing. If you have several ESP32s on your desk, the computer may give them all similar port names. Make Claude check the board’s MAC address before flashing.
What I built: Phosphor
I wrote a piece of software for this board called Phosphor. It is a desk device that glows like old vacuum fluorescent displays (VFD).
It has a clock and alarm, weather, an internet radio, a focus timer, an hourglass and slow pixel scenes you can leave running and watch. The look changes: VFD, Commodore 64 style, Amiga style and Atari 2600 style. It uses the board’s motion sensor, audio and clock chip.
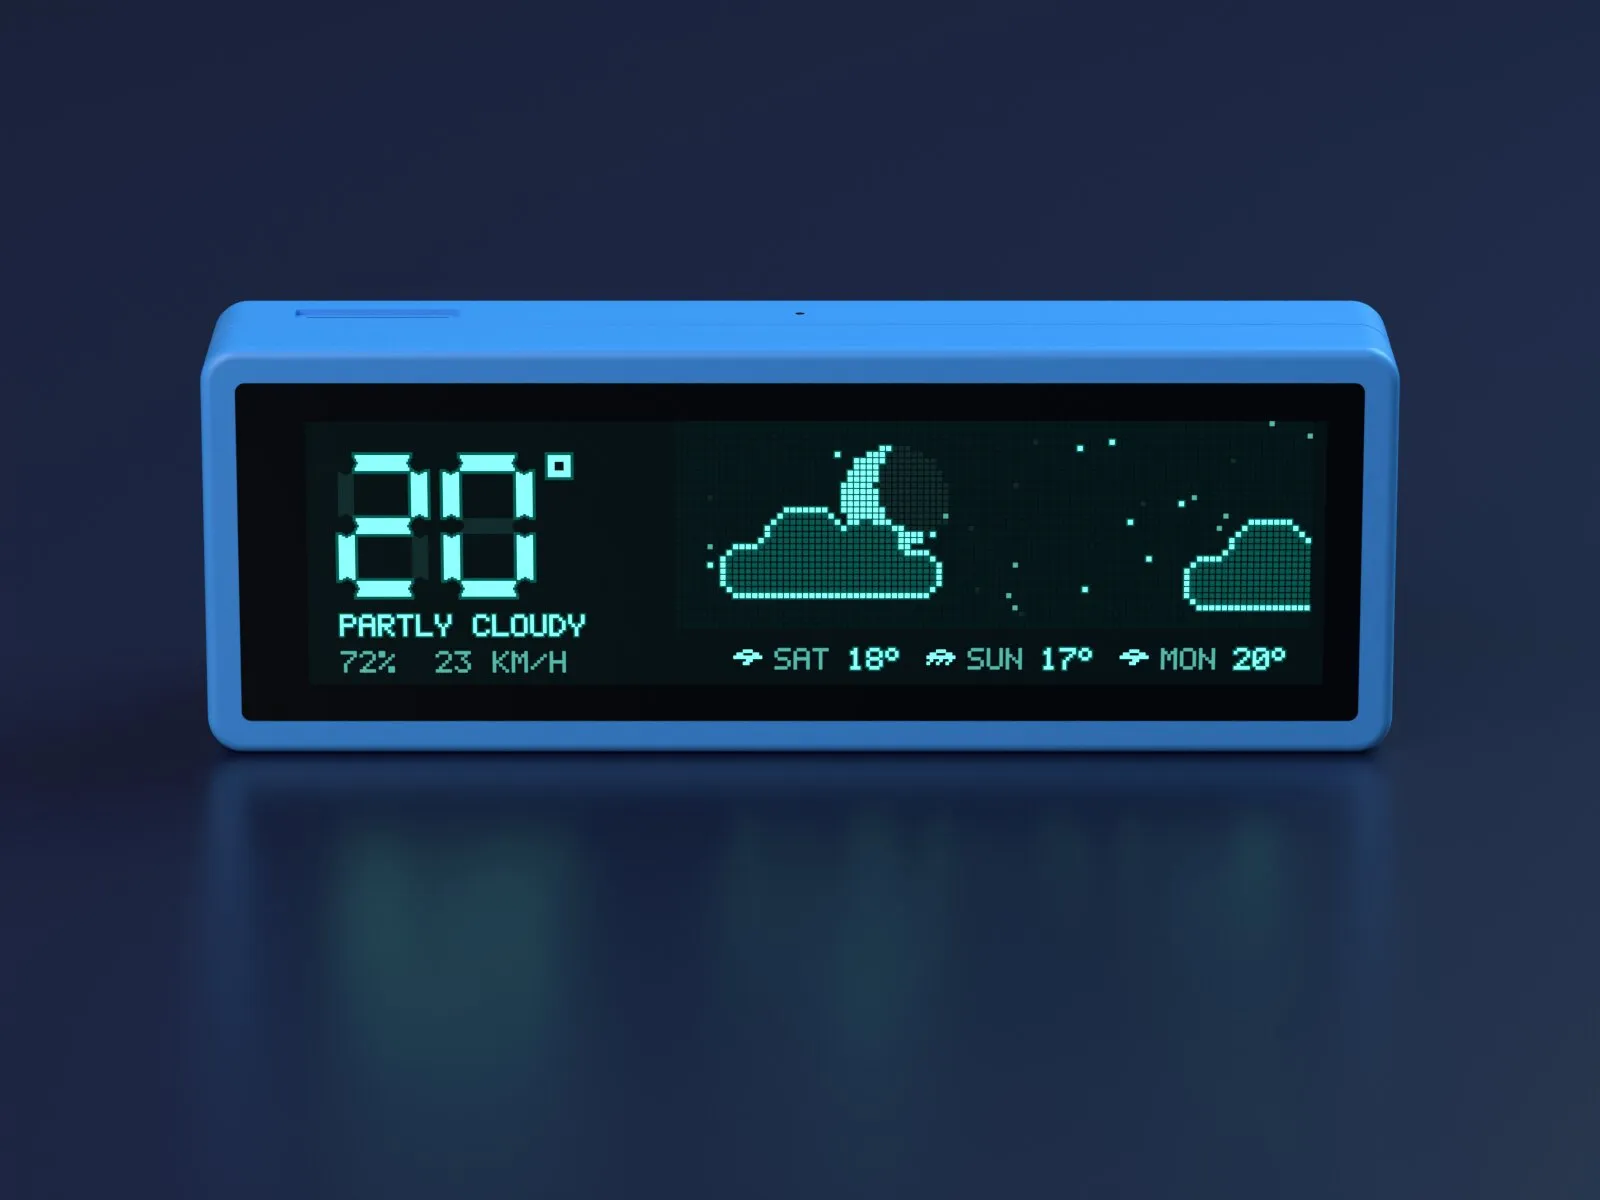
Weather · Melih Koray
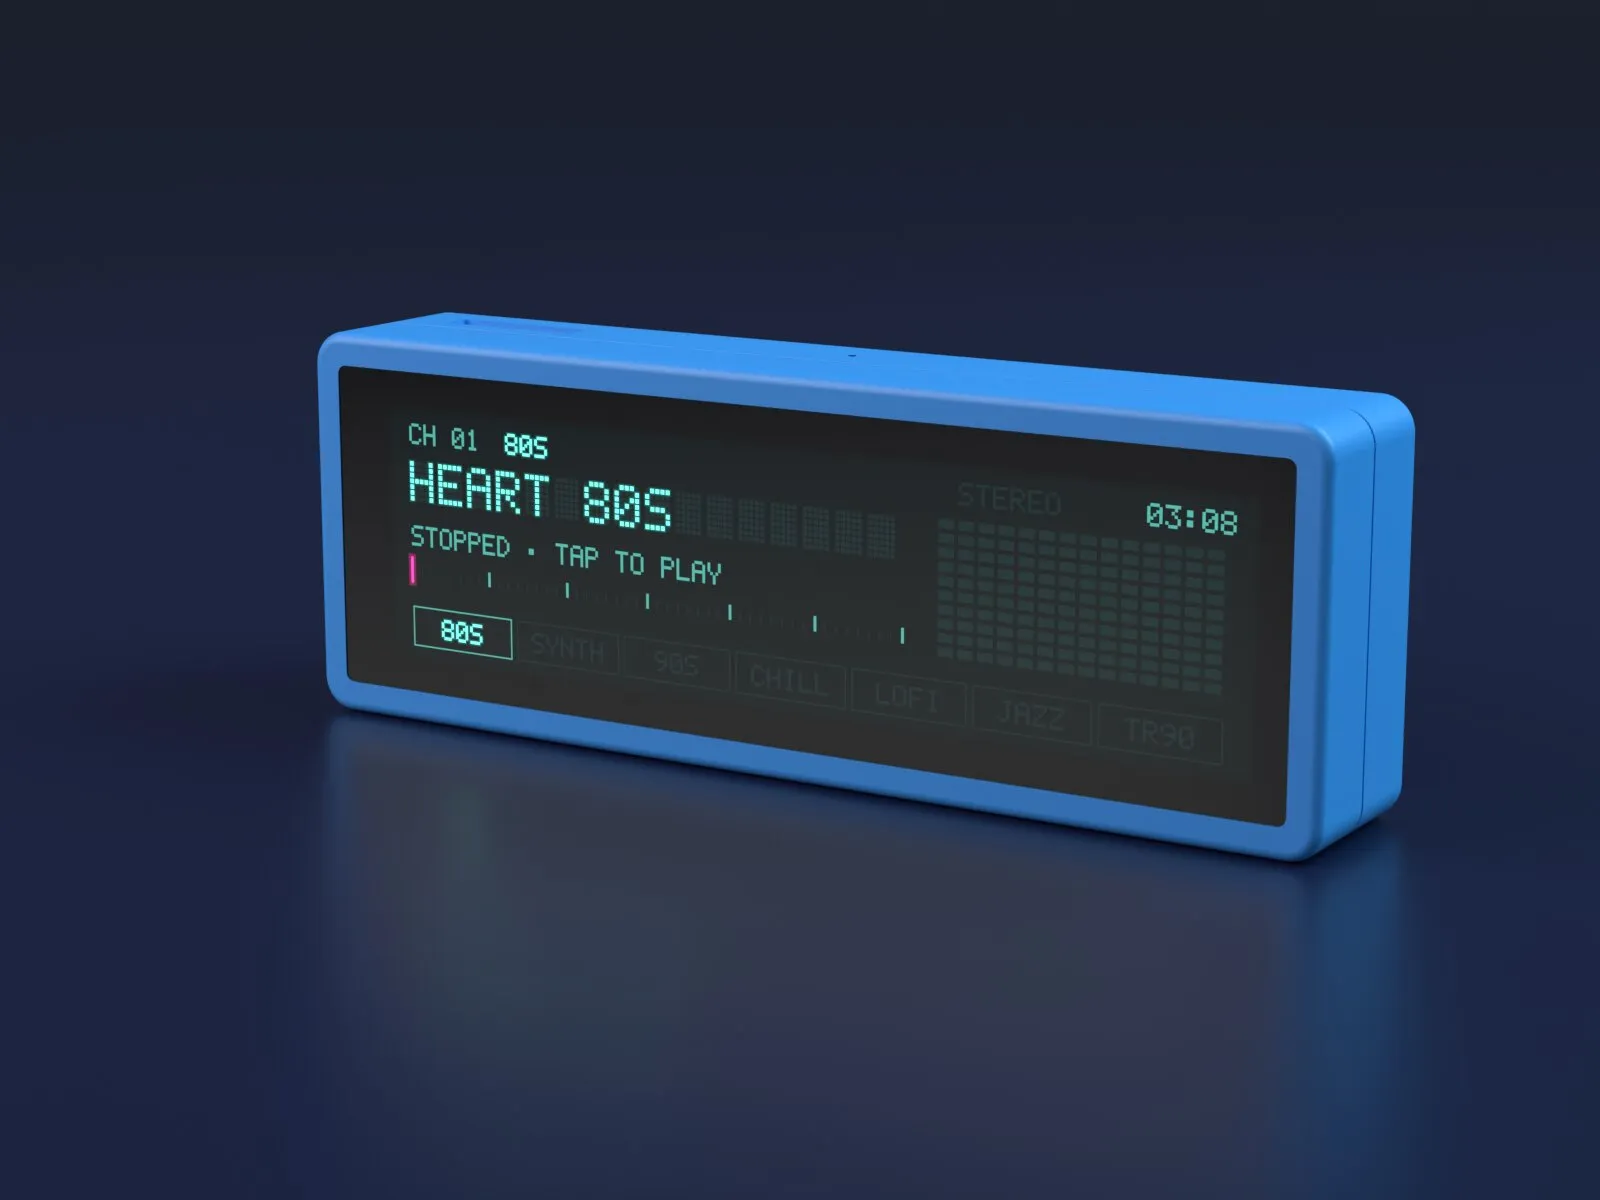
Internet radio · Melih Koray
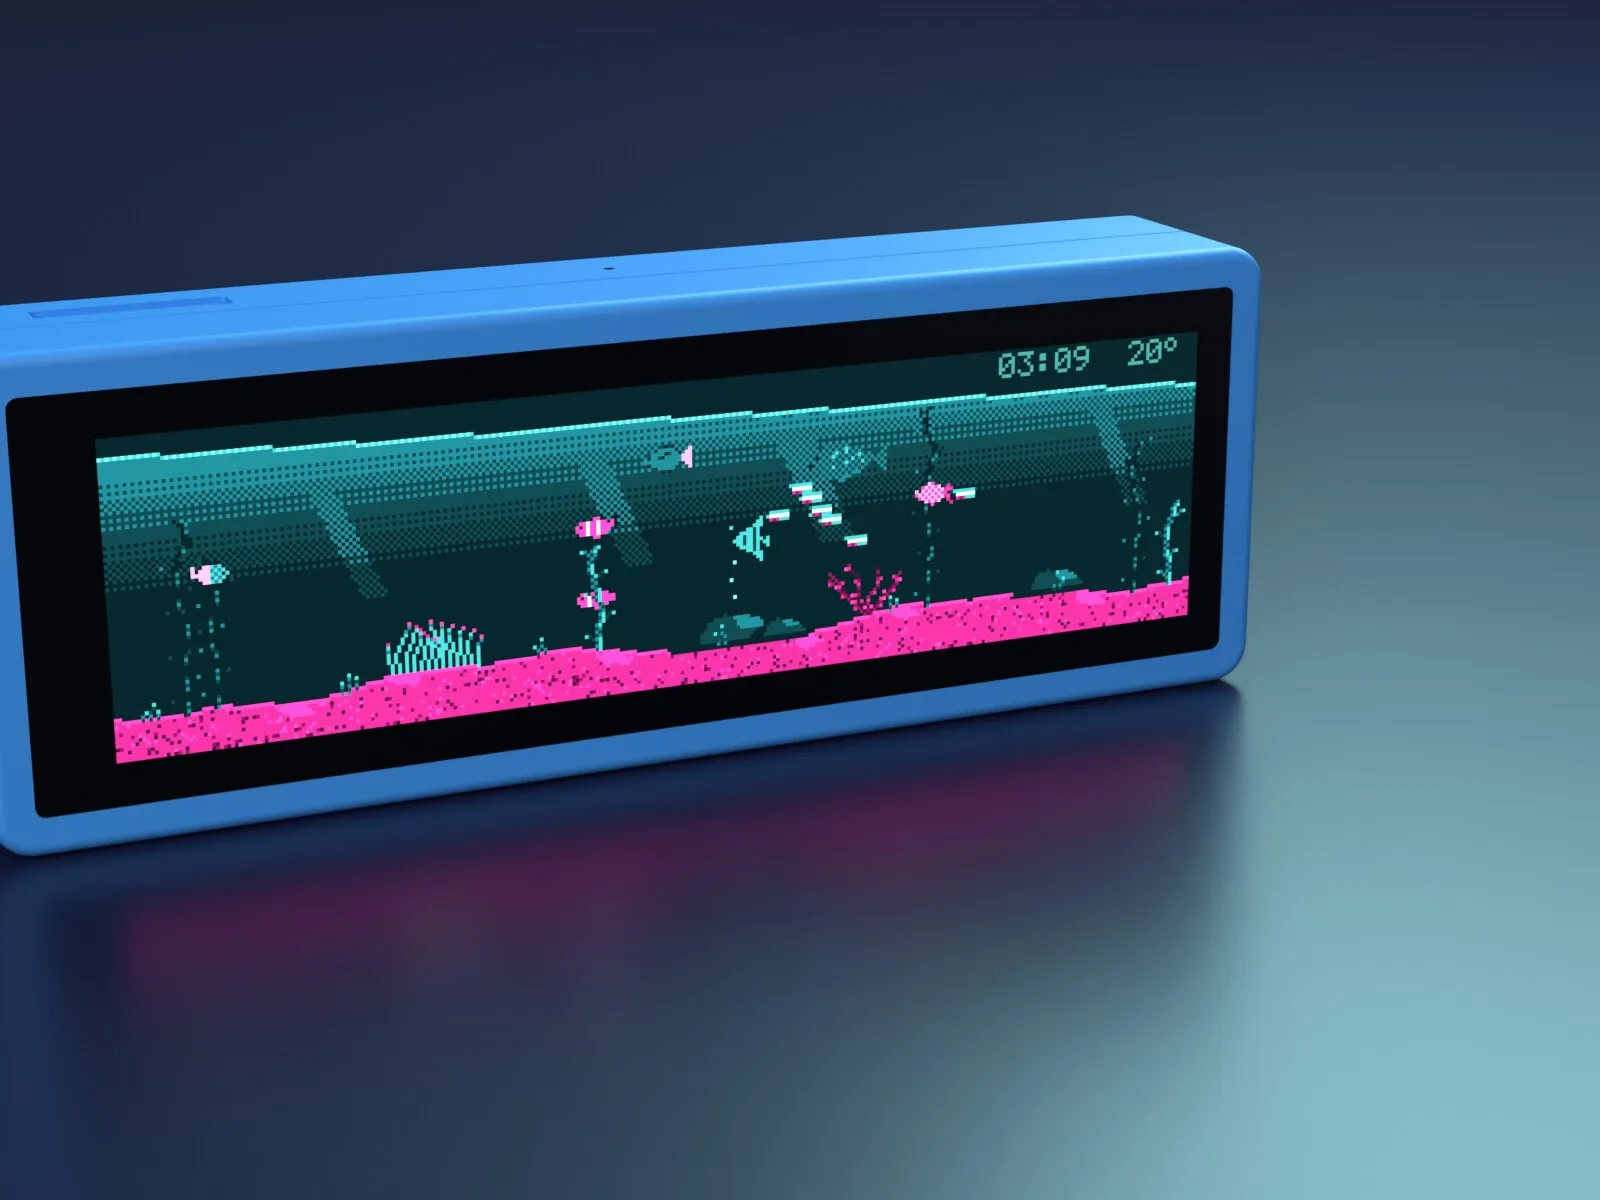
Aquarium scene · Melih Koray
It is open source, under the GPL-3.0 license. It installs from the browser: Chrome or Edge, a USB cable, no other software. The code is on GitHub.
Best practices and pitfalls
I ran into these while driving the board with my own code. Most of them are not spelled out this clearly in the docs.
- Find out the version first. V1 or V2, check the back of the board. The wrong version’s example can leave the screen dark.
- The panel is natively portrait. The screen is natively 172×640, a strip standing upright. I draw everything in landscape 640×172 and rotate it when sending to the screen.
- Self-shutdown on battery. Pin EXIO6 of the TCA9554 expander on the board must stay high. If it drops, the board shuts itself off on battery. You do not notice on USB; it shows up when you switch to the battery.
- Take the touch direction from the example. On my board the touch coordinates came out inverted relative to the screen; on my first try, swiping left and right changed the volume. I worked out the right direction from Waveshare’s example code.
- The backlight works inverted. On my board the backlight signal was inverted: the lower the value, the brighter the screen. The screen on/off command in the driver also behaved the other way round, so I turn the screen off only by dimming the light.
- Draw the image in PSRAM and send it in pieces. Prepare the full frame in PSRAM and send it to the screen in turn through two small buffers. Do not make the buffers too big, or you run out of internal memory.
- One HTTPS connection at a time. Encrypted connections eat internal memory. Do not let weather, time sync and radio all try to connect at once.
- Check the MAC before flashing. Once I flashed the firmware onto another board on my desk. Now I look at the board’s MAC address before every flash.
Who is it for, and who is it not for?
It is for:
- People who want to build a clock, radio, notification or status display for their desk.
- People who want to build their own voice assistant or a Home Assistant panel.
- People who want audio, microphones, sensors and a battery on one board without soldering.
- People who like playing with a bar-shaped interface.
It is not for:
- Interfaces that need lists, forms or multi-line menus. A height of 172 pixels is too narrow for that.
- People who will attach many parts to the board. Expansion is through solder pads, with no ready-made socket.
- People who want to work in MicroPython. There is no ready driver for this board.
Conclusion
The ESP32-S3-Touch-LCD-3.49 brings the display, audio, microphones, clock and sensors together on one board, and it is one of the least-effort boards for building a desk device. The bar display makes design harder, but with the right idea it looks very good. Thanks to its microphones and PSRAM it can also be used as a voice AI assistant. If you will write code, the pitfalls above will save you time; if you want to try it without writing any, Phosphor installs from the browser in a few minutes.
Frequently asked questions
What is the ESP32-S3-Touch-LCD-3.49 used for?
It is an ESP32-S3 board with the display, audio, microphones, clock chip, motion sensor and battery input all on the board. You can use it without soldering to build a desk clock, an internet radio, a Home Assistant control panel, a voice AI assistant or a status display.
Can it be used as an AI assistant?
Yes. The open-source XiaoZhi project officially supports this board: the board itself listens for the wake word, sends your speech to a language model in the cloud and reads the answer out through the speaker. The language model does not run on the board; the board acts as the microphone, speaker and screen.
Does it understand voice commands without internet?
To a limited degree, yes. Espressif's ESP-SR library can do offline wake word and predefined command recognition on the ESP32-S3. Free-form conversation needs internet and a cloud model.
What can I program it with?
Waveshare provides examples for Arduino IDE and ESP-IDF. ESPHome supports the display and touch, and it also builds with PlatformIO. There are LVGL 8 and 9 examples for the interface. I could not find a ready-made driver for this board in MicroPython.
Can I program it without knowing how to code?
You can install ready-made firmware: projects like XiaoZhi, TuneBar or Phosphor install from the browser or with a single command. If you want it to do your own thing, having an AI assistant like Claude write the code is the shortest route today.
How good is the display?
A 3.49-inch IPS panel, 172×640 pixels, 16.7 million colors, 350 cd/m² brightness and 1200:1 contrast. Being IPS, colors hold up at an angle. The long, thin shape is the big difference: great for a single line of info, a clock or a ticker, too narrow for lists and forms.
Does it run on a battery?
Yes. The board has a charging input for a 3.7 V lithium battery and a software-controlled power button. The Case A enclosure takes an 18650 cell, Case B (3.49B) comes with a 3.7 V LiPo; both are also sold without a battery.
Is there a difference between V1 and V2?
Yes. According to Waveshare, boards shipped after June 8, 2026 are V2. Some pins moved, including the backlight, and the example code for the two versions is not interchangeable. The V2 board is marked 'Rev1.1' and its box is labeled 'V2'.
Where can I buy it and how much is it?
It is sold in Waveshare's own store and on Amazon. On the day I wrote this, the Case B version without a battery was $29.99 in the Waveshare store. Prices change, so check the listing for the current one.
Sources
- Waveshare ESP32-S3-Touch-LCD-3.49 documentation
- Waveshare product page (3.49B-EN)
- Waveshare Arduino examples
- Waveshare ESP-IDF examples
- Waveshare example code, V1 (GitHub)
- Waveshare example code, V2 (GitHub)
- XiaoZhi ESP32, folder for this board (GitHub)
- Espressif ESP-SR benchmark table
- ESPHome mipi_spi display component
- ESPHome axs15231 touchscreen component
- CNX Software: board introduction and case dimensions
- Phosphor source code (GitHub)